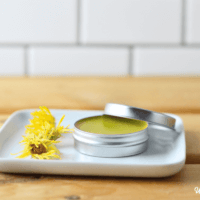
To continue the theme of DIY natural lip care recipes, I’m sharing this recipe for homemade herbal lip balm. I love my homemade lipstick and tinted lip balm, but sometimes I just want something for dry lips. After gardening or being outside in the wind/snow my lips can start to get chapped, but I don’t want color or shine.
This recipe is also great for guys and kids since it isn’t brightly colored or strongly scented. The natural lip balm uses an optional nourishing herbal infusion that helps heal and protect lips. You can also leave these ingredients out to have an unscented version that still offers hydration. Plus it’s easy to add a little more healing and scent with essential oils if desired.
I also like that this herbal lip balm lasts practically forever since a little goes a really long way. Organic lip balm is also great for stocking stuffers and small gifts!
Lip Balm With Herbs
The herbal ingredients are naturally moisturizing, antibacterial, and anti-fungal. Some people have had success with using it to speed up the healing of cold sores. It also doesn’t have petroleum or synthetic ingredients like most commercial lip products so you can feel safe using it on yourself or your kids.
Here I’ve used a blend of echinacea, comfrey, plantain leaf, calendula, and a few others. Chamomile and lemon balm are also nice botanicals to add. Lemon balm specifically helps with cold sores so it’s a nice addition if they’re an issue for you.
Other Nourishing Ingredients
I use a liquid oil thickened with organic beeswax as the base of the herbal lip balm. Certain seed oils, like almond, apricot, and avocado seed oil work well here. Apricot and avocado are thicker though and need diluted in something like olive oil, sweet almond, or coconut oil.
You could also replace a little bit of the beeswax with shea butter or cocoa butter. Keep in mind shea butter is much softer than beeswax so you may need to reduce the liquid oil a little to compensate.
Scenting Your Herbal Lip Balm
I usually leave this unscented, but you can add some fragrance with essential oils if preferred. Sweet orange, lavender, and even frankincense are some good options. Or I’ll sometimes add some peppermint. You could even make a chai version with a tiny bit of cinnamon leaf (not bark) and cardamom essential oils.
Phototoxic essential oils, like bergamot and lime, should not be used.
How to Infuse the Oil
There are several ways to infuse the herbs into the liquid carrier oil. The longer version is to combine the herbs and oil in a glass jar and leave it to infuse for 2-4 weeks. You’ll want to shake the jar every so often. The faster option is to use a double boiler. Place the herbs and oil in the top of a double boiler for 1-3 hours over low heat until the oil is a deep green.
After infusing, strain the herbs out by pouring the mixture through a cheesecloth. Let all the oil drip out and then squeeze the herbs to get the remaining oil out. Compost your herbs when done.
You can store your finished creation in a tin, or use a lip balm tube for even easier application.

5 from 1 vote
Healing Herbal Lip Balm
This nourishing lip salve is infused with healing herbs for chapped, hurting lips. Great for all ages and guys too!
Prep Time3hours hrs
Active Time10minutes mins
Yield: 4 ounces
Author: Katie Wells
Equipment
- Small tins (or lip balm tubes)
- Double boiler OR glass bowl and pot
Materials
- ½ cup olive oil (or sweet almond oil)
- ½ tsp echinacea
- ½ tsp comfrey leaf
- 1 tsp plantain leaf (herb-not the fruit!)
- 1 tsp calendula flowers
- ½ tsp yarrow flowers
- ½ tsp rosemary leaf
- ¼ cup beeswax pastilles
- 10 drops vitamin E oil (optional)
- 5-10 drops essential oil (optional)
Instructions
- Infuse the herbs into the liquid oil. See above for more details.
- Heat 1/4 cup of the infused oil in a double boiler with the beeswax until melted and mixed. Save the extra oil for use on wounds/cuts or another batch of lip salve.
- Remove from heat and stir in the essential oil and vitamin E oil (if using).
- Pour into small tins, glass jars, or lip balm tubes and use on dry or chapped lips.
Notes
- Store in a cool, dry place and use clean hands to apply.
- This will last for about 6 months if stored properly (a little longer if you use the vitamin E oil).


